I searched the internet for inspiration (see it here), and decided on making a calendar out of brown paper bags. To jazz them up a bit I added a sparkle trim, and little cards to mark the days.
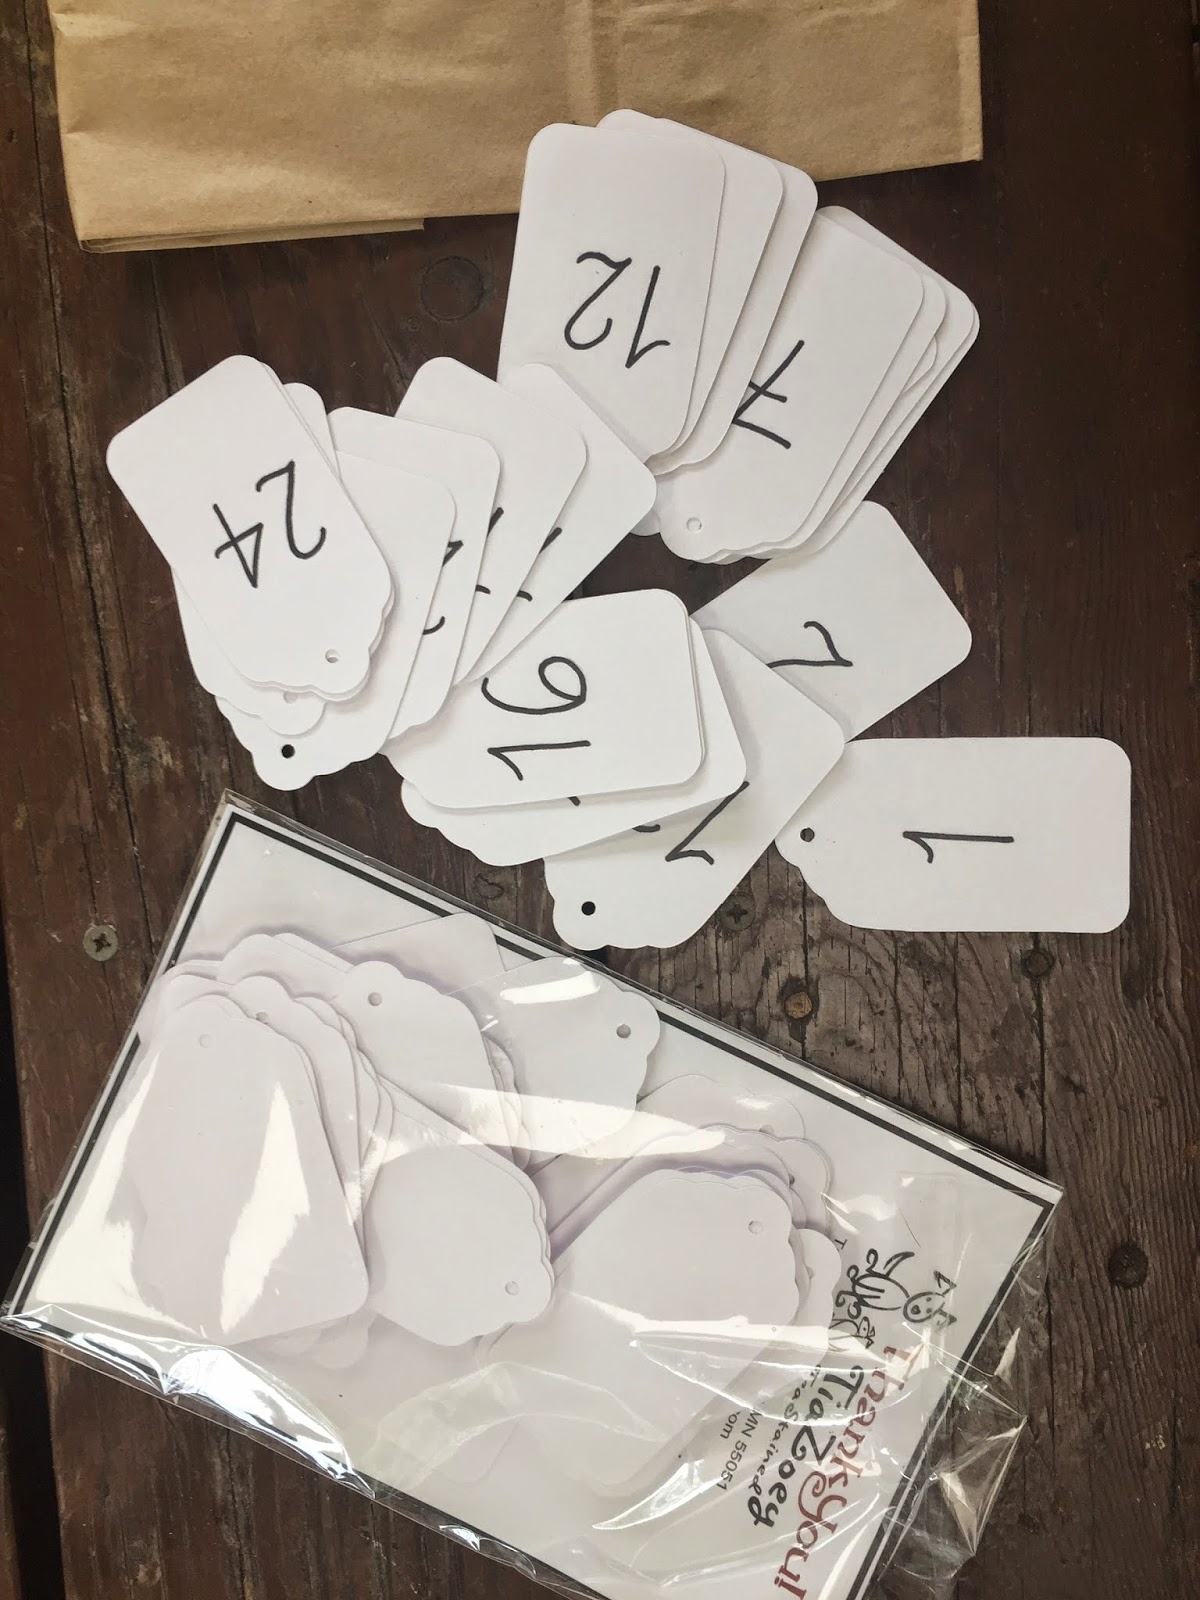
I found the tags on Etsy. Asked my daughter (who has a much nicer handwriting than I do), to write the numbers from 1 to 24 on the tags. This is a step that could be also stamped, that is if you have number stamps, which I do not.
After the tags were done, I cut the top of each brown bag off, and then folded about three inches down. Then used a hole punch to punch a hole through the folded top area of the bag.
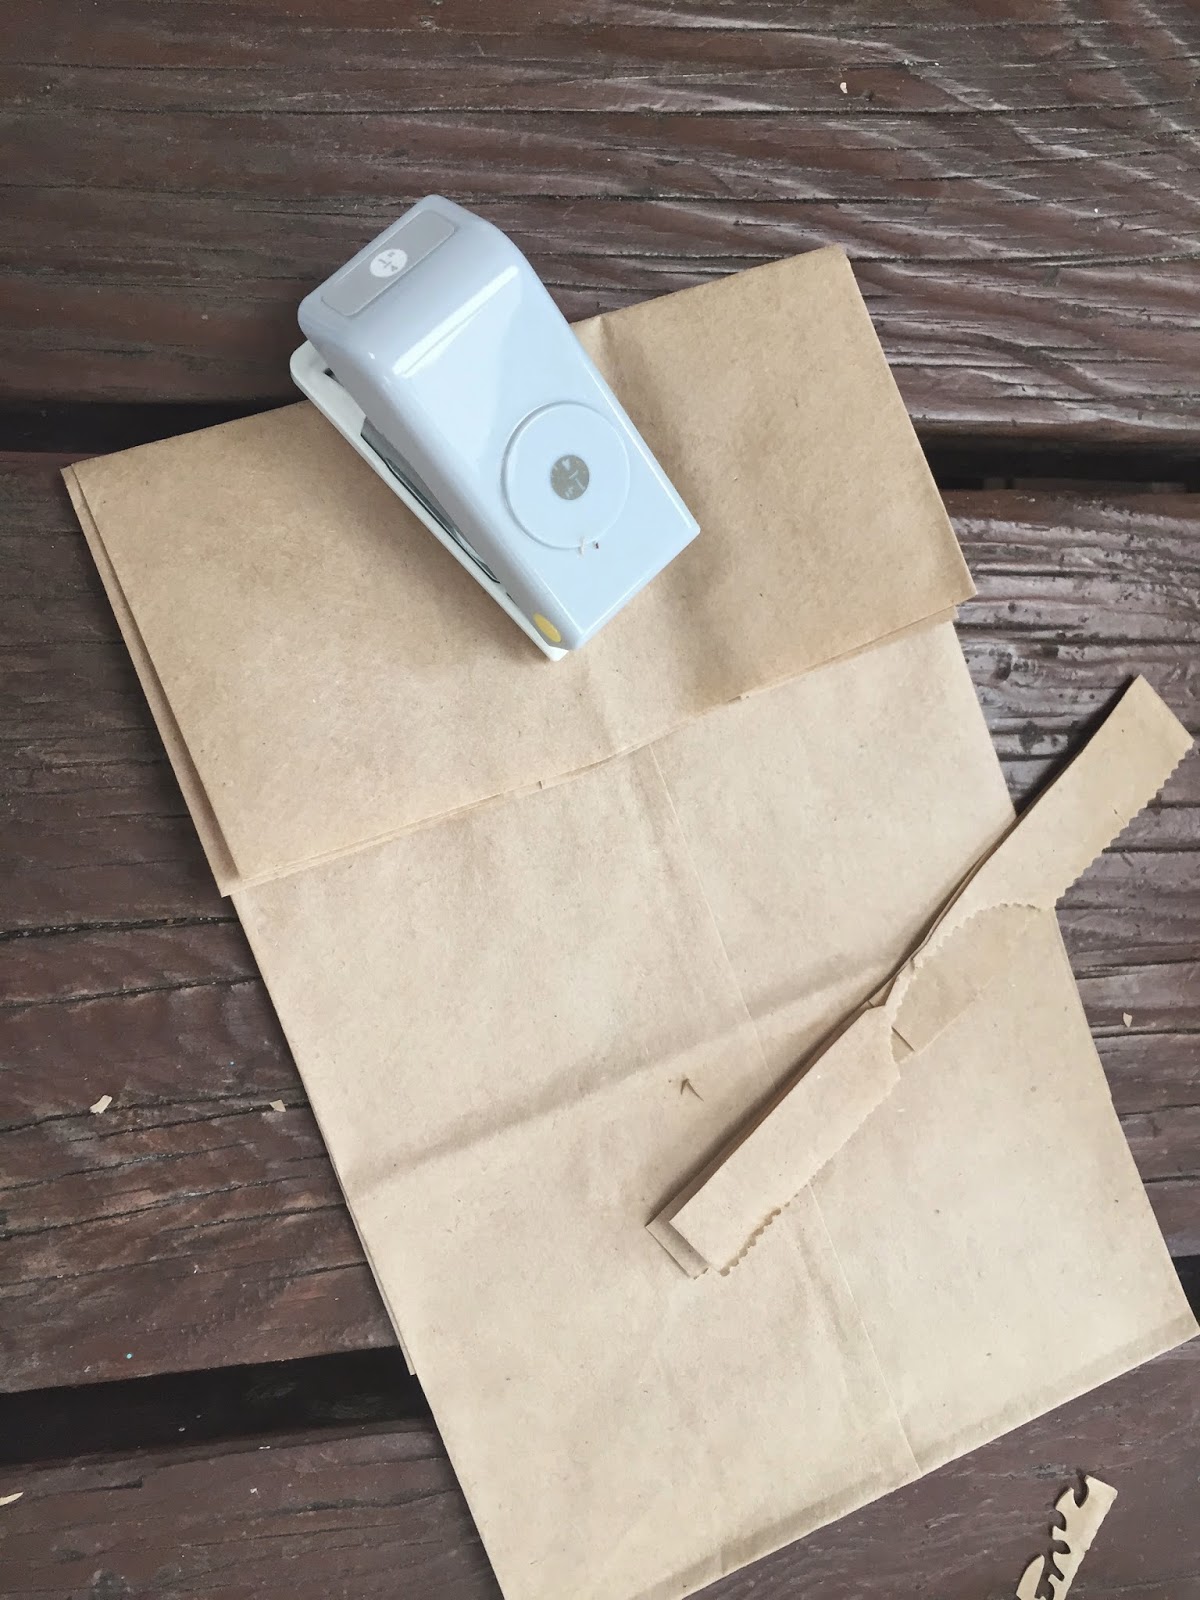
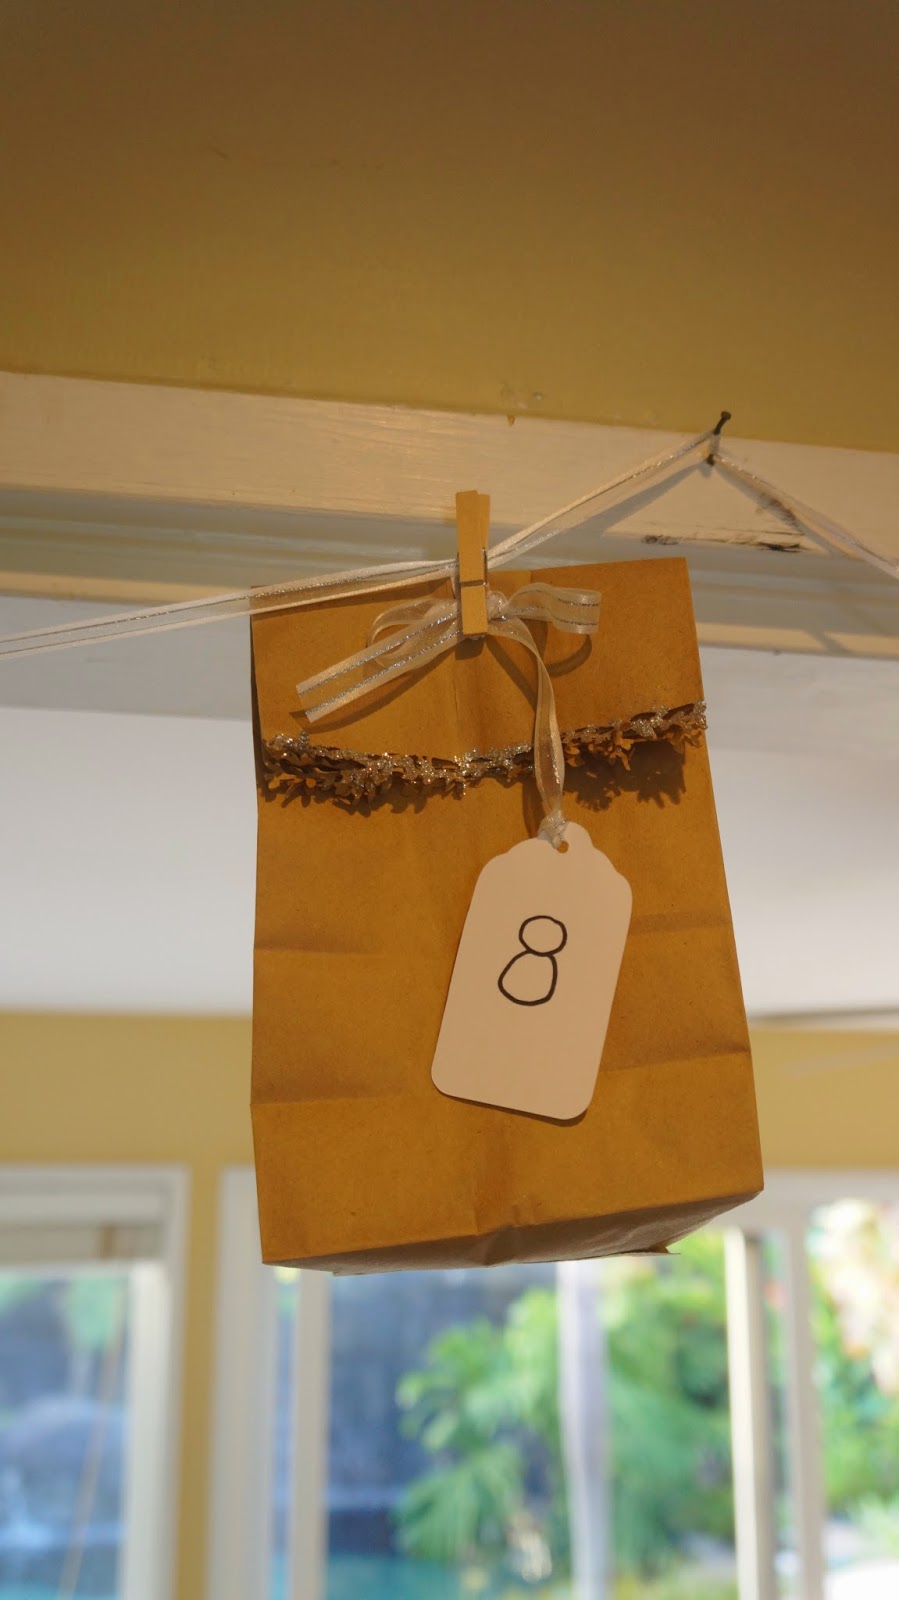
The next step was to use an edge punch (this particular one is by Martha Stewart) that I found at our local craft store to create the trim of the bag. I picked this garland pattern because I thought it suited the occasion.
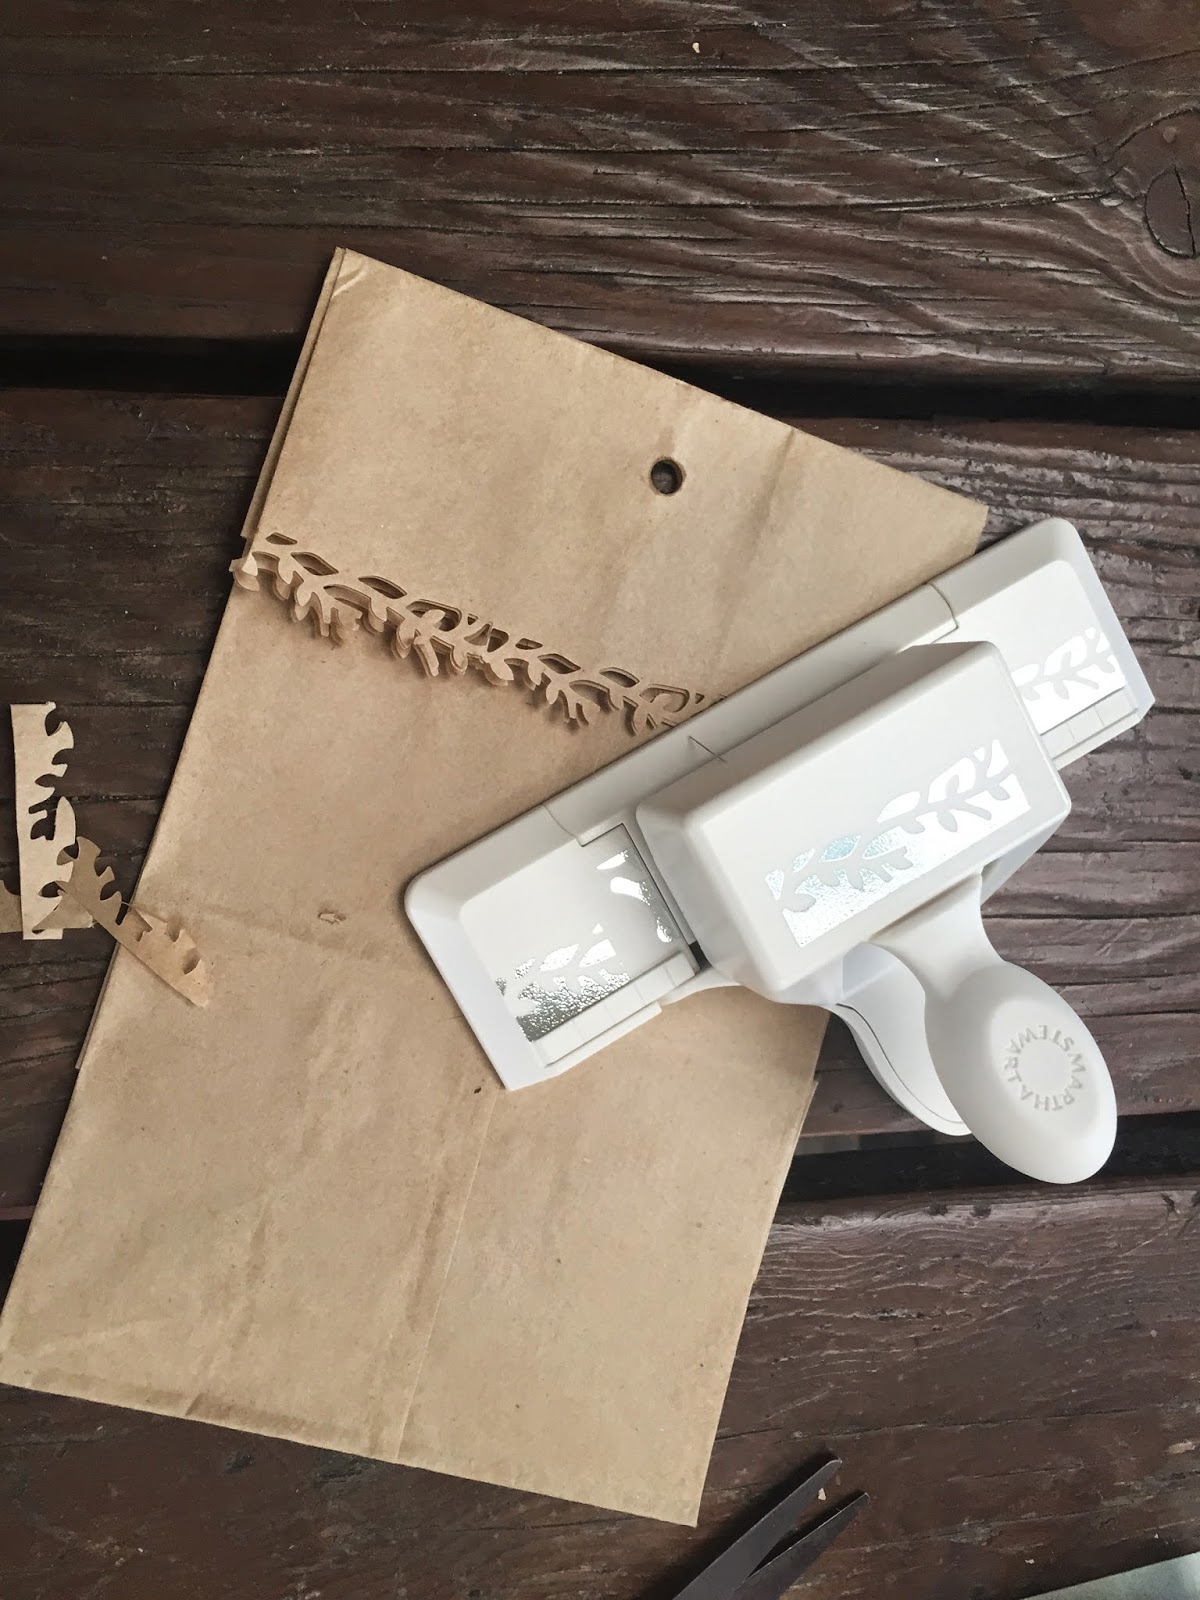
Finally, I brushed the some Mod Podge (I suppose you could also use some other glue) over the punched out pattern and added silver and white sparkle to it.

Voila, the baggies were done. Now it was time to fill them with small goodies for my three kids. After that was accomplished, I cut thin silvery ribbon into lengths of about a foot, threaded the ribbon through the punched hole in the bag and tied the number on it.
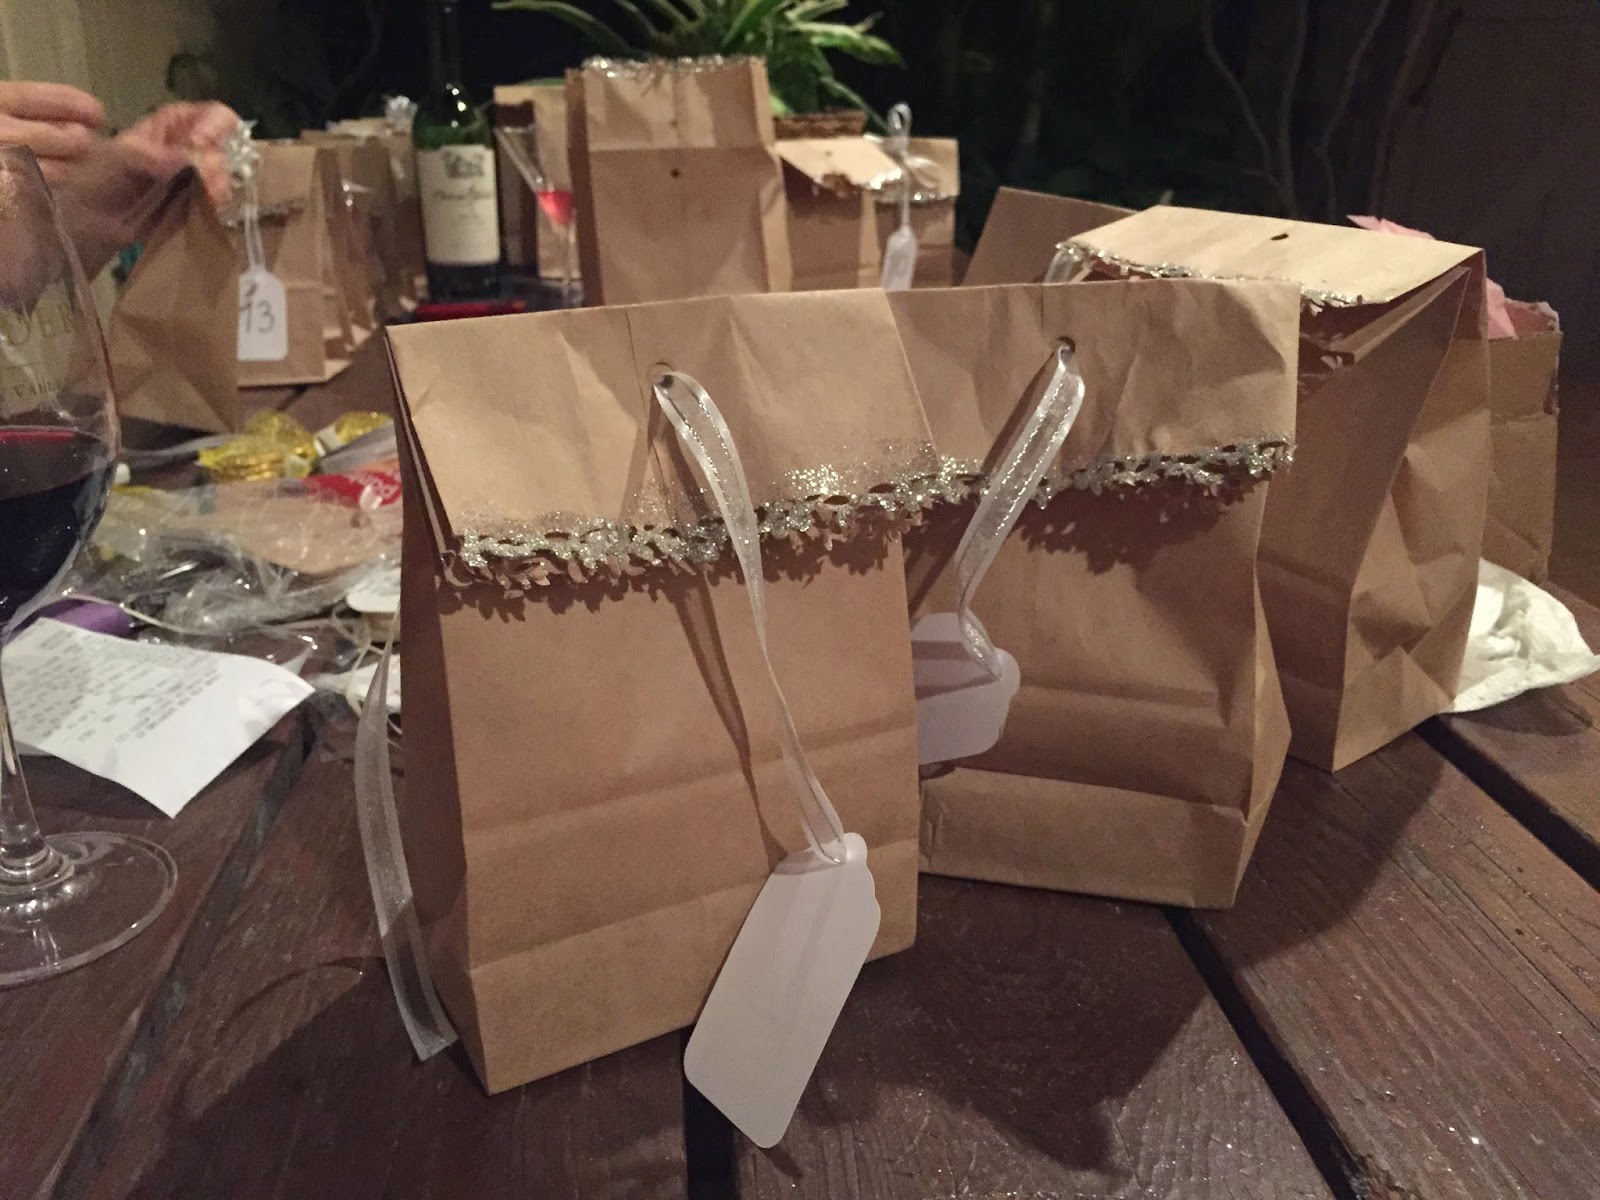
My friend Amy helped me with the finishing touches. She has also kindly provided the bottle of wine you can see amongst the bags. I am a firm believer that a glass of good wine helps every project turn out even better. One person making something is a craft. Two or more people? It's a party! (Check out my pumpkin painting party here.)

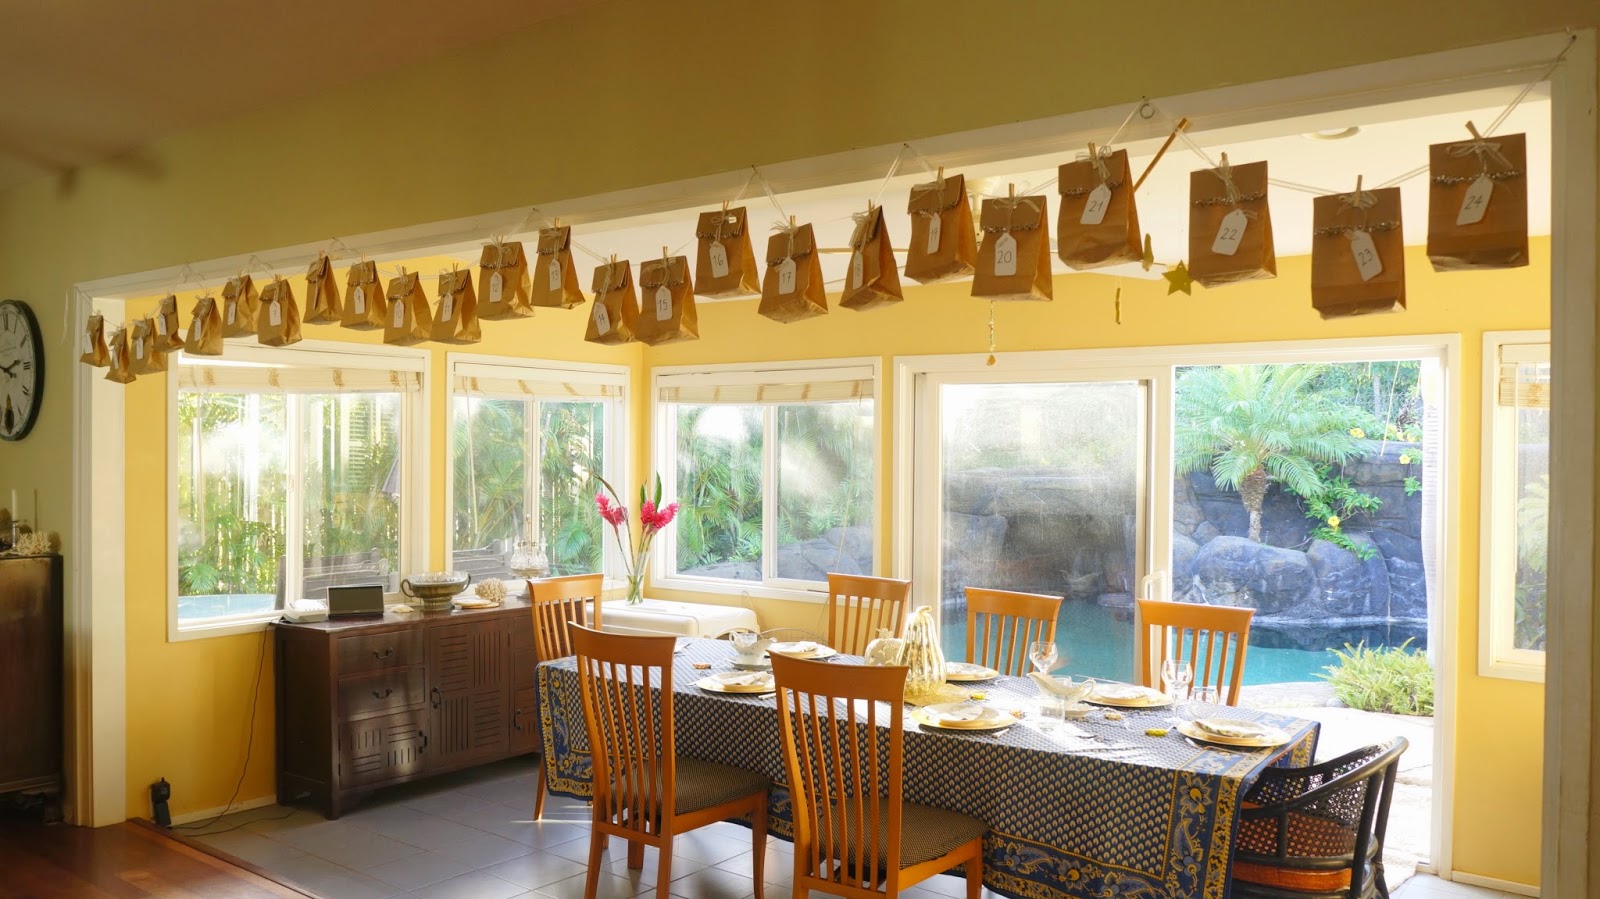
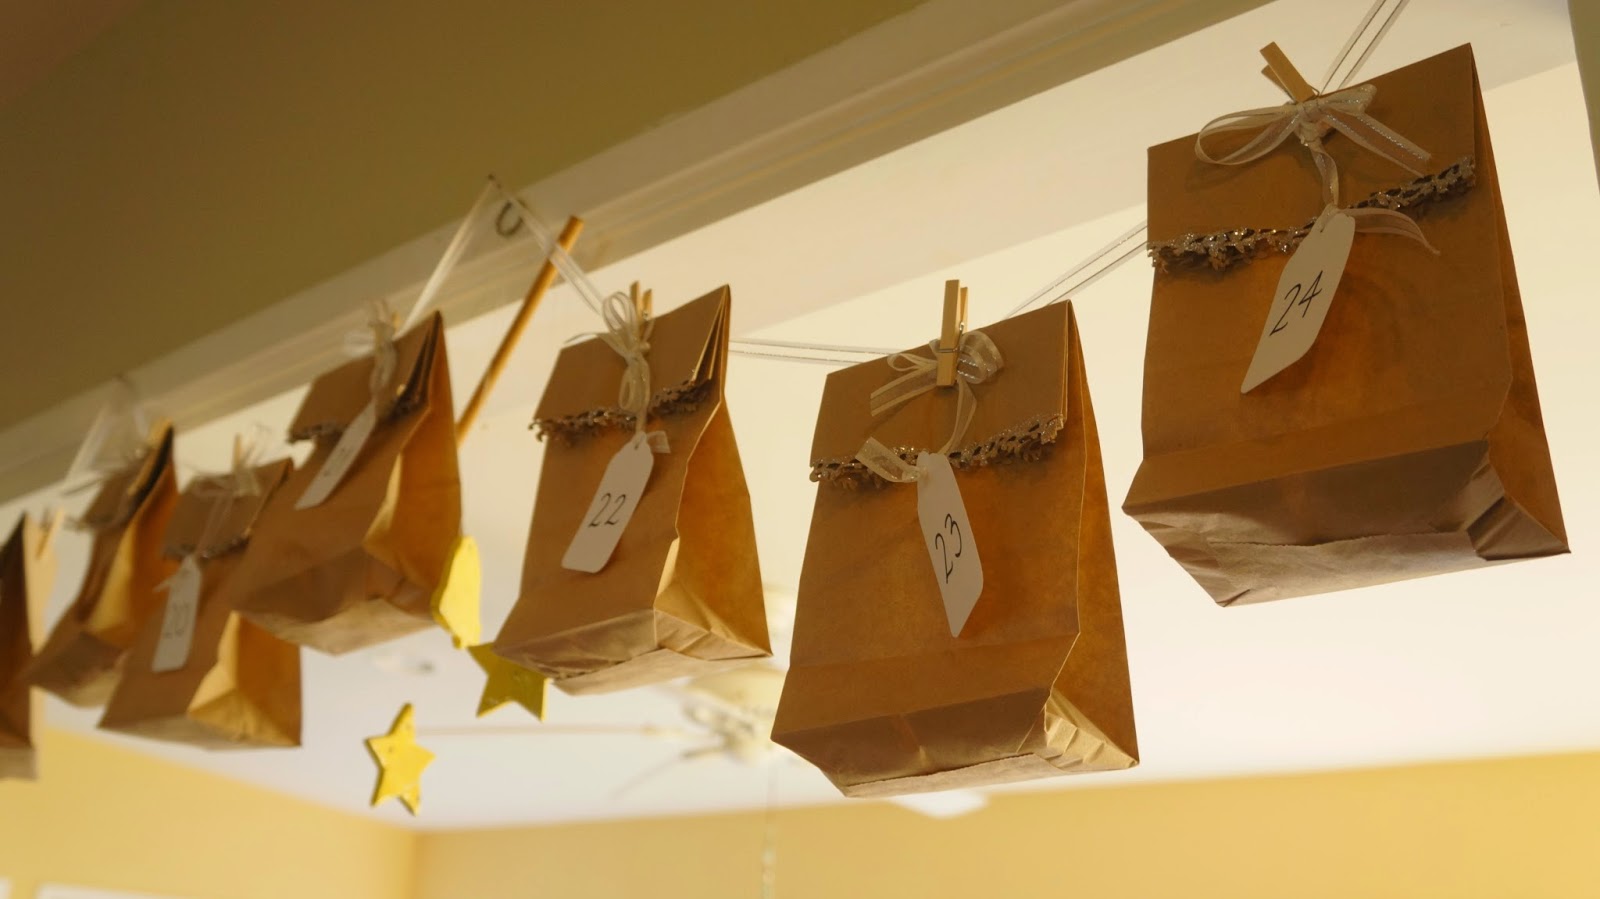
Here are the finished bags all lined up by number. The final step was to add small clothes pins (also found on Etsy) to the tops of the bags and clip them onto a ribbon we tied to the wall.

Now they all hang there patiently awaiting the first day of Advent. My ten-year-old is already excited to start unclipping and opening them.

The entire project took about two hours, plus the time gathering the supplies. I am happy with how it turned out. What do you think?
No comments:
Post a Comment